What is more nourishing than a warm cup of broth on a cold day, or when you’re hungry, rundown, or have the flu? What smells better than to open the lid of a pot with freshly made broth? I would say – barely anything! As you can probably tell, I love my broth. I use it for cooking soups, stews, rice, and even drinking it on its own.
Health Benefits
There is a reason that broth makes us feel good; the health benefits are numerous. Some of the facts:
- Broth contains a lot of minerals, including calcium (note that the calcium content isn’t very high unless you grind some of the leftover bones into the broth), magnesium, potassium, and trace minerals (which are highly absorbable and balanced).
- While minerals make bones hard, collagen keeps them resilient. About 28 percent of a bone is collagen (the rest is 50 percent minerals and 22 percent water). Cooking breaks down collagenous protein from bones and cartilage into gelatin, which contains an amino acid profile that builds strong bones, joints, hair, skin, and nails, and enhances overall well-being.
- Glutamine (one of the main amino acids in broth) is especially important for our immune system and feeds the lining of the gut by helping the villi of the small intestine heal and grow, improving digestion and nutrient absorption. Many supplements that address leaky gut contain glutamine as a main ingredient. Glutamine stimulates immune cells, helps protect us against illness and disease, and cuts cravings for sugar and carbohydrates!
- Glycine is the simplest of all amino acids and a main player in many processes in the body: detoxification, sugar metabolism, production of bile salts to digest fats, reduction of inflammation, and wound healing.
- Gelatin has the unusual property of being hydrophilic, even after it has been heated. This means it attracts and holds liquid (in this case, digestive juices). This is very important as it improves the digestion of cooked meals when raw food is missing or limited in a meal.
- Although gelatin is not a complete protein, it has a meat sparing effect by allowing the body to more fully utilize the complete proteins that are ingested. This makes it economical for the environment (saving meat and using the whole animal) and your budget (bone broth is inexpensive to make).
- Broth is a staple in many Asian countries where soup is traditionally served with every meal, including breakfast.
(To learn more, check out Sally Fallon Morell and Kaayla T. Daniel’s book, Nourishing Broth: An Old-Fashioned Remedy for the Modern World, which covers the detailed science and includes a number of recipes. You can also watch this video, in which Daniels discusses broth benefits.)
To get a rich flavor and a lot of gelatin, my favorite way to make broth is with a pressure cooker. The process is even quicker than with a slow cooker. Besides, when it comes to nutrients, the shorter cooking time results in less destruction of heat-sensitive vitamins.
Ingredients
- 1 whole chicken (or any bones/carcasses of your choice) or 3-4 lbs beef bones
- 2-4 tbsps lemon juice or vinegar
- 1 onion
- 2 carrots
- 2-3 celery sticks
- 1-2 tsp black peppercorns
- 2 bay leaves (optional)
- 1 small piece of lemon rind
- ½-1 inch piece of ginger root
- ¼ celery root (optional, for extra flavor)
- 1 leek (optional)
Chicken Broth Recipe
- Place all of the ingredients in a pressure cooker. Add lemon juice or vinegar (this helps leach minerals from the bones), and cover all contents with cold, filtered water.
- Close the lid, turn on the heat, and bring the pressure cooker to high pressure (according to its instructions). Keep the pressure cooker on high for about 15 minutes. Turn off the heat and allow the pot to release pressure naturally, about 20 minutes.
- Come back after a half an hour (or the next morning!), and, voila, here is your delicious chicken broth. That wonderful smell when you open the lid will bring you right to heaven!
- Once the chicken has cooled enough to be able to be handled, take it apart and save the meat for later. Strain the broth. You can also just eat parts of the chicken and veggies as is, together with the broth. Add some sea salt, and you have a quick and nourishing meal.
Beef Broth Recipe
- Place beef bones in a pressure cooker. Cover with cold, filtered water, and bring everything to a boil.
- Skim the foam a few times.*
- Add all other ingredients, and close the lid. Bring the pressure cooker to high pressure (according to its instructions). Keep the pressure cooker on high pressure for about 15 to 30 minutes. Turn off the heat and allow the pot to release pressure naturally, about 20 minutes.
- Return after half an hour, or the next morning, and voila, here is your delicious bone broth!
- With tongs, remove the bigger bones and pieces from the pot with. Then, strain the broth. If you want to use the broth right away, a fat separator is handy to separate the clear broth from the fat. If you don’t have a fat separator, let the broth cool to room temperature and put it in the fridge. The fat on the top will get hard and will be easy to remove if you prefer to do so.
- Save the fat for cooking, especially when it comes from grass-fed beef bones. It will also have a fine flavor depending on the ingredients you used for the broth.
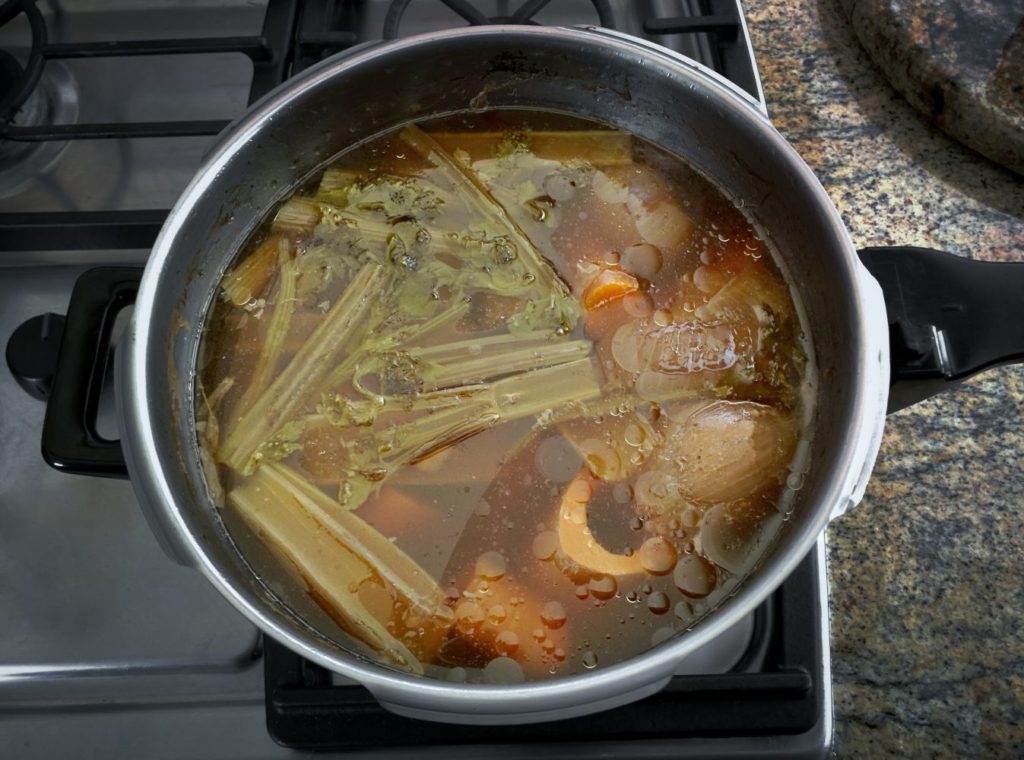
Notes
- Stock or broth? Traditionally, stock is made more from bones, while broth is more from meaty parts. In my kitchen, I use the term broth, no matter if I use a fresh, whole chicken to start with, or the leftover bones from a roasted chicken.
- Variety is a good thing. For chicken broth (stock), any bony chicken parts, such as necks, backs, and feet (so much gelatin!) can be used, as can a whole chicken. For beef broth, knuckle bones make the most gelatin-rich broth, while marrow bones give a delicious flavor. Shanks have more meat but often a good portion of cartilage, and sometimes even marrow. My favorite beef mix contains knuckle and shank bones. Broth can also be made with carcasses and/or bones from turkey, duck, lamb, pig’s or calf’s feet, or fish heads and trimmings for fish stock.
- Mixing is allowed. While amounts vary, I generally try to fill the pot at least half way (often more) with bones and vegetables. Then, I add water up to the ⅔-line, which is the maximum recommended on most pressure cookers. If your broth ends up too thick, you can always add more water afterwards, or conversely, if it’s too thin, you can boil it down.
- Quality is key, as always when it comes to food. Choose organic or grass-fed bones, as well as organic or pasture-raised chicken. Chicken stock made from non-organic chicken parts might not gel.
- Reusing bones. Usually after making one pot of broth, there is still a lot of gelatin on the bones. Using the same bones with fresh vegetables will result in another rich pot of broth – sometimes up to three times.
- *When is skimming necessary? Skimming results in a clearer broth. Besides, the foam can cause an off flavor if cooked too long. (This has never happened to me using a pressure cooker, but I usually skim beef broth.) For long cooking times of beef bones, i.e. when using a regular pot on the stove, it is essential to skim the foam.
- Storing leftovers. After straining the broth and letting it cool down to room temperature, it can be stored in the refrigerator for up to five days, or in the freezer for many months. If the broth has a nice layer of fat (at least an inch thick) on it and the top of your mason jar is sealed when the broth is very warm, it stores for several weeks in the fridge (once you have let it cool down).
- No space in your refrigerator to store the broth? Sometimes I have a pressure cooker going on my stove all week long. I am continuously taking broth out and adding in more good stuff, such as new beef bones, carcasses from roasted chickens, and more vegetables. As long as the broth is brought to a boil once a day in summer, and every other day in winter, it will be fine. In case you forget about it on the stove and worry whether your good broth has gone bad, trust your nose – it will smell bad, especially when you heat it up again; it will smell really bad!
- No pressure cooker? If you don’t have access to one, a regular stock pot or a slow cooker are alternatives. Usual cooking times are eight to 12, and up to 24, hours for the slow cooker on a low setting. If you use a stockpot on the stove, and are able to watch the pot, let it simmer for a minimum of two hours or longer. Check from time to time, and add more water if needed. Keep it on a low simmer.






2 replies on “Bone Broth Basics: How To Make In A Pressure Cooker”
30 minutes or overnight? I’d appreciate to hear what you have tried and with which results. Or did you mean a cook time of 30min and then letting it sit?
Martin, I meant to let it cook for 30 minutes and then switch it off. I usually don’t let anything cook in a pressure cooker for longer than an hour, but I would let it sit overnight with the stove turned off, or even all day the next day as I mentioned in the section ‘Notes’.