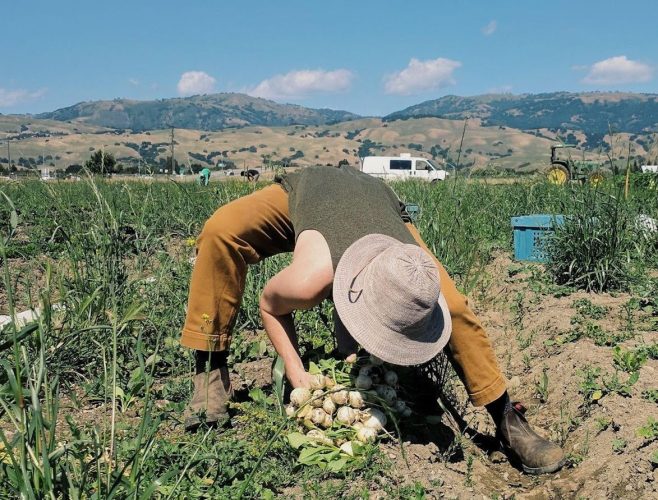
When you’re married to a farmer (and you also happen to study how the body moves), “work in the field” becomes a multifaceted and deeply layered expression. Harvesting nasturtium flowers becomes an exercise in fine motor efficiency. Washing carrots inherently becomes an exploration in spinal and scapular mobility.
However therapeutic and tranquil, the repetitive movements in gardening and farming that calm and still the mind are the same movements that also aggravate and inflame muscles, causing aches and pains.
Stretching before, during, and after a day in the dirt is great. But because we are often bearing a load, or working with some kind of resistance (aka, dirt and mud), it would be best to build strength and flexibility within a given joint to support the additional load.
Between digging, weeding, pruning, transplanting, and raking, here are five mobility exercises to find a little more freedom in the mind and body, even after a day in the dirt!
(*Please note that the video clips included here are sped up. Go slow and don’t miss a thing!)
1. Waking up the Thoracic Spine
A lot of farming and gardening requires turning from one side to the other, and back over and over again – like weeding or harvesting, for which you’re pulling something up out of the ground and then placing it to the side in a bin or a big pile. Mobilizing the thoracic spine will help the body twist with a little more integrity.

From a table top shape on hands and knees, bring your right hand to the back of your head. Keep the hips square towards the ground (bonus points if you’re near a wall to anchor the left hip), and with a long spine, rotate open to the right. Hold for a breath before returning to neutral. Do five rotations to the right, then switch sides.
2. Wringing out the Wrists
If you’re using tools to seed, transplant, and weed, chances are you’re putting a lot of strain on your hands and wrists. Try some controlled, articular rotations in the wrists (and even fingers) to mitigate some of the soreness you experience in the extremities.
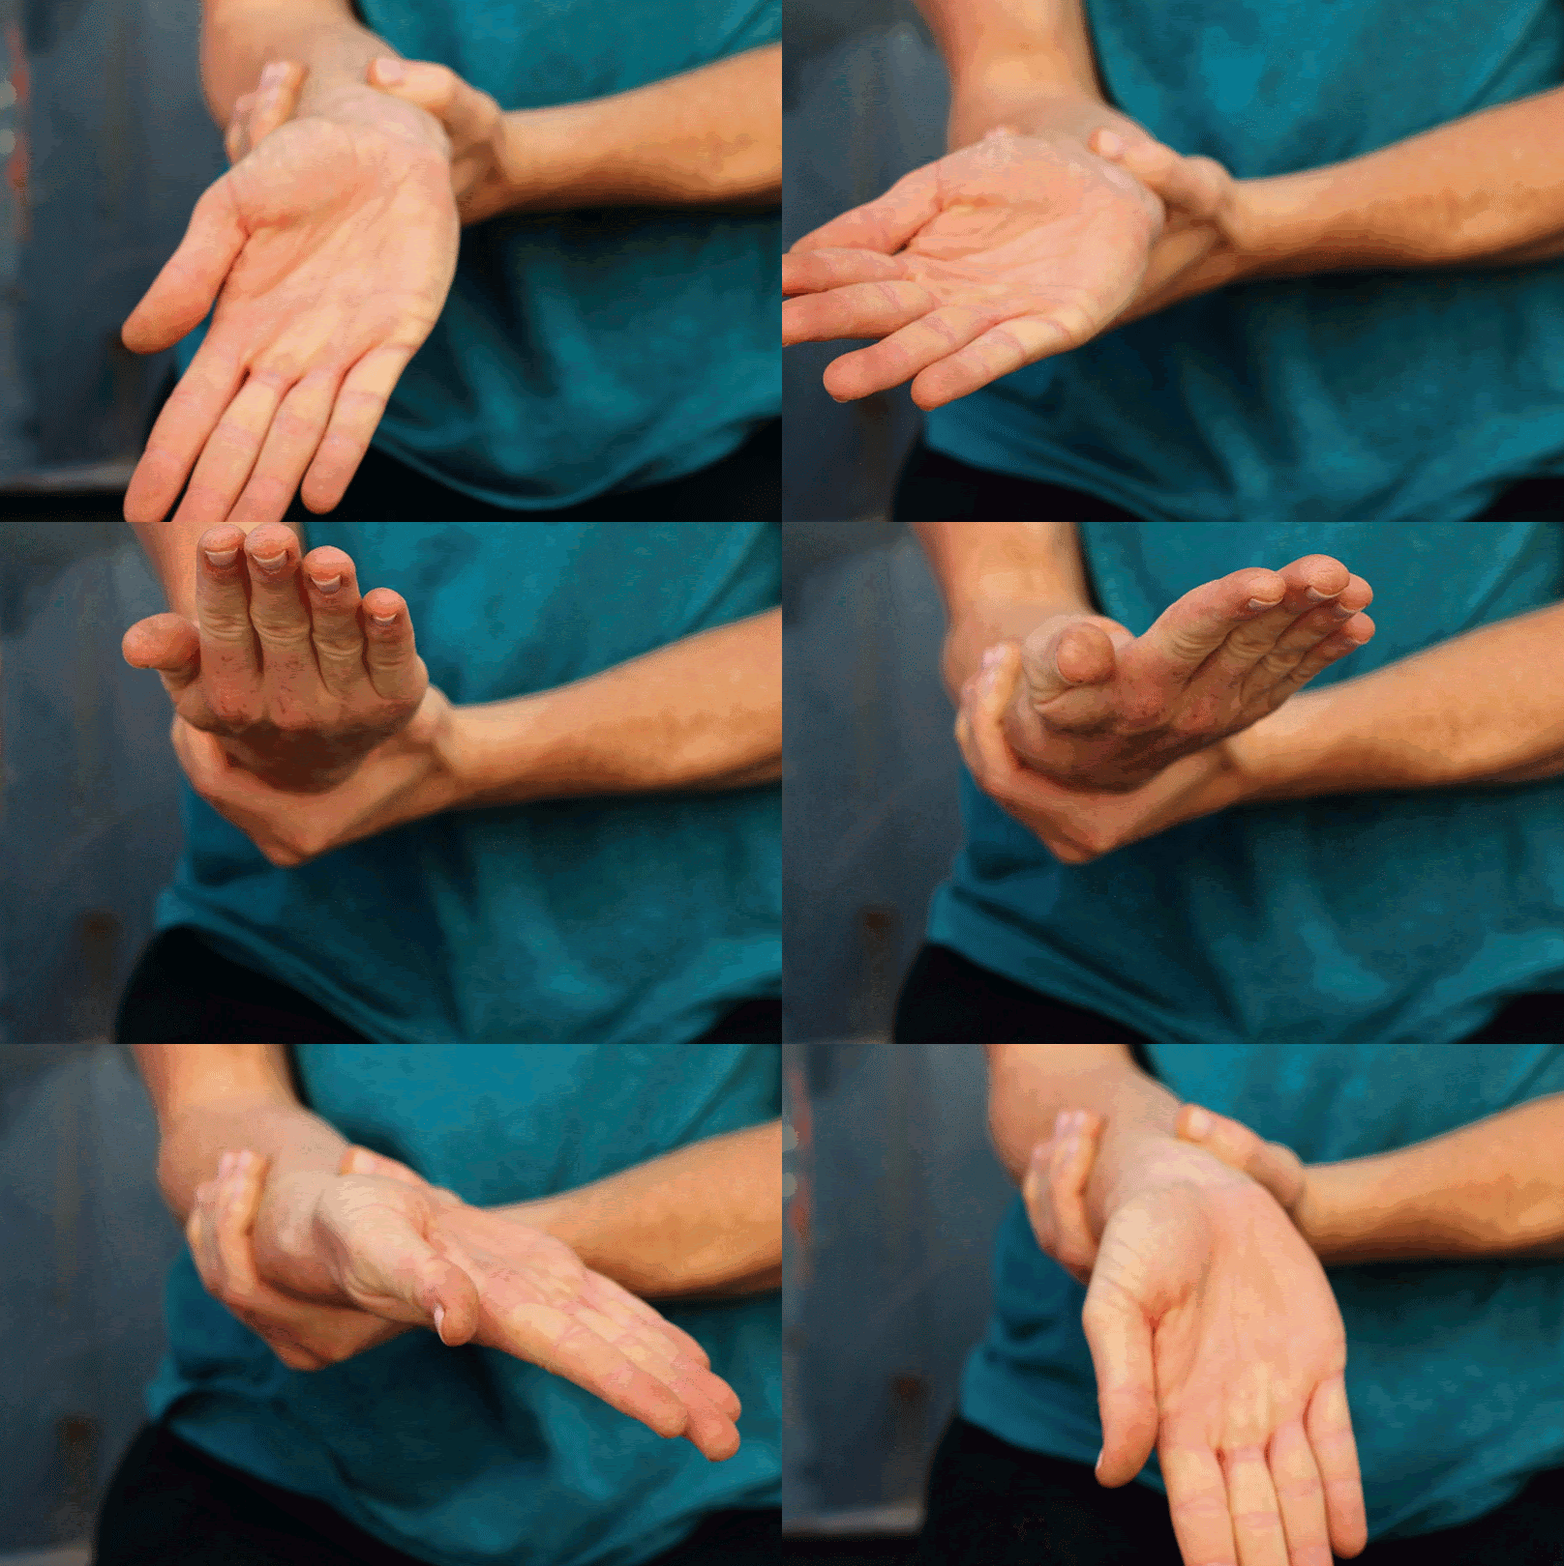
With elbows fixed to the sides of your ribs, bring your right hand in front of you, palm facing up, as if you’re holding a platter. Use the left hand to stabilize the right forearm and prevent the forearm from moving. We’ll move the wrist in four different directions, with the intention of smoothing those movements out to create a more fluid, circular pattern with the wrist.
With a flat palm, and fingers together, extend the wrist so that it faces forward, then send it out to the right side, thumb side out. From there, flex the wrist bringing it up towards your face. Try to do so without bending your fingers! Keep a nice flat palm. Once the wrist is flexed, send the pinkie side edge of the hand out to the side. We’re essentially making a really big circle with the wrist, strengthening and stretching the muscles within the wrist as we go. Move super slowly! Don’t forget to go the opposite direction before switching sides. Do five rounds in each direction on each side.
3. Make Your Hips Happy!
Due to modern-day habits of sitting for long periods of time (whether in the car or at a desk, or even squatting for long periods of time when working in the garden), our legs get stuck in an externally-rotated state. This can contribute to lower back pain, tight glutes, and weak inner-thigh muscles, among others. Working both internal and external rotation at the hip helps to create an evenness of strength and flexibility within and around the hip joints.
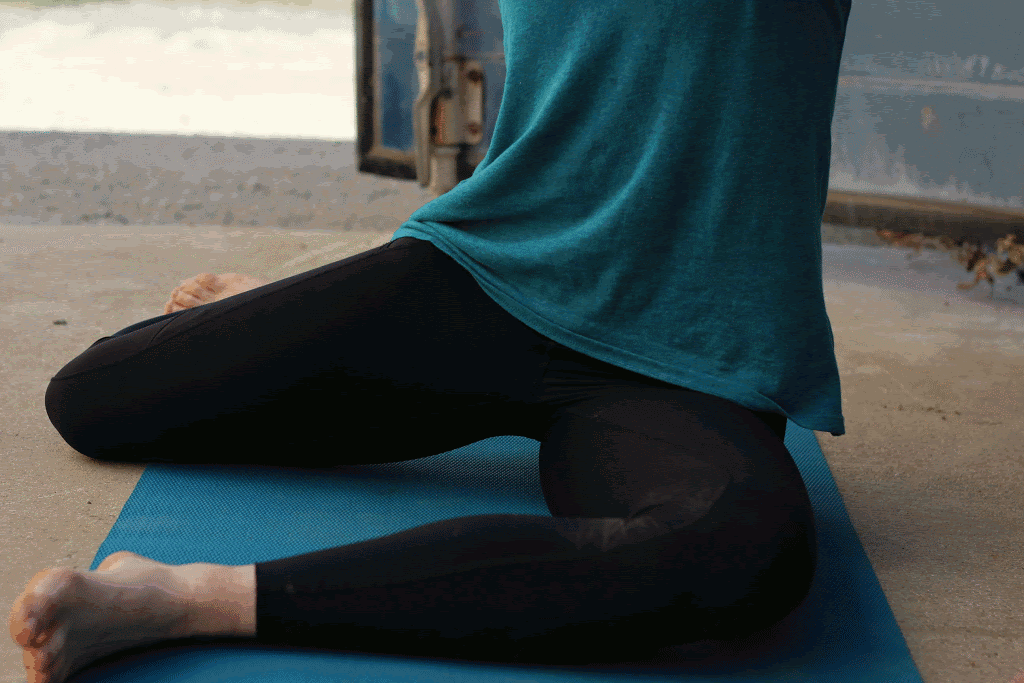
Begin in a 90-degree by 90-degree shape. If you’re on a mat (as a point of reference), have one shin parallel to the front edge of the mat, and the other shin parallel to the long edge of the mat. Start by lifting the back knee, externally rotating that leg as much as you can. Keeping that same amount of external rotation, roll the body towards the other hip. Keeping the legs in the 90-degree by 90-degree shape, you’ll wind up in a similar position facing the opposite way.
Here’s the kicker: Keep as tall of a spine as you can! If you need to bring your hands to the floor to support you, totally fine! As a means of building yourself up from there, gradually take your hands out of the picture. “Look ma, no hands!” Try it three to five times.
4. Perfecting your Posture
Whether we’re bent over a steering wheel or a phone, or stuck with our hands in the dirt, due to these habitual patterns, the body’s anatomy naturally ends up in a forward-folded state. This can cause strain on the pectoral muscles through the front of the chest and, though it can elongate some of the upper back muscles, they inherently become weak. The following exercise helps to create spaciousness where we need it, and tone where it’s lacking.
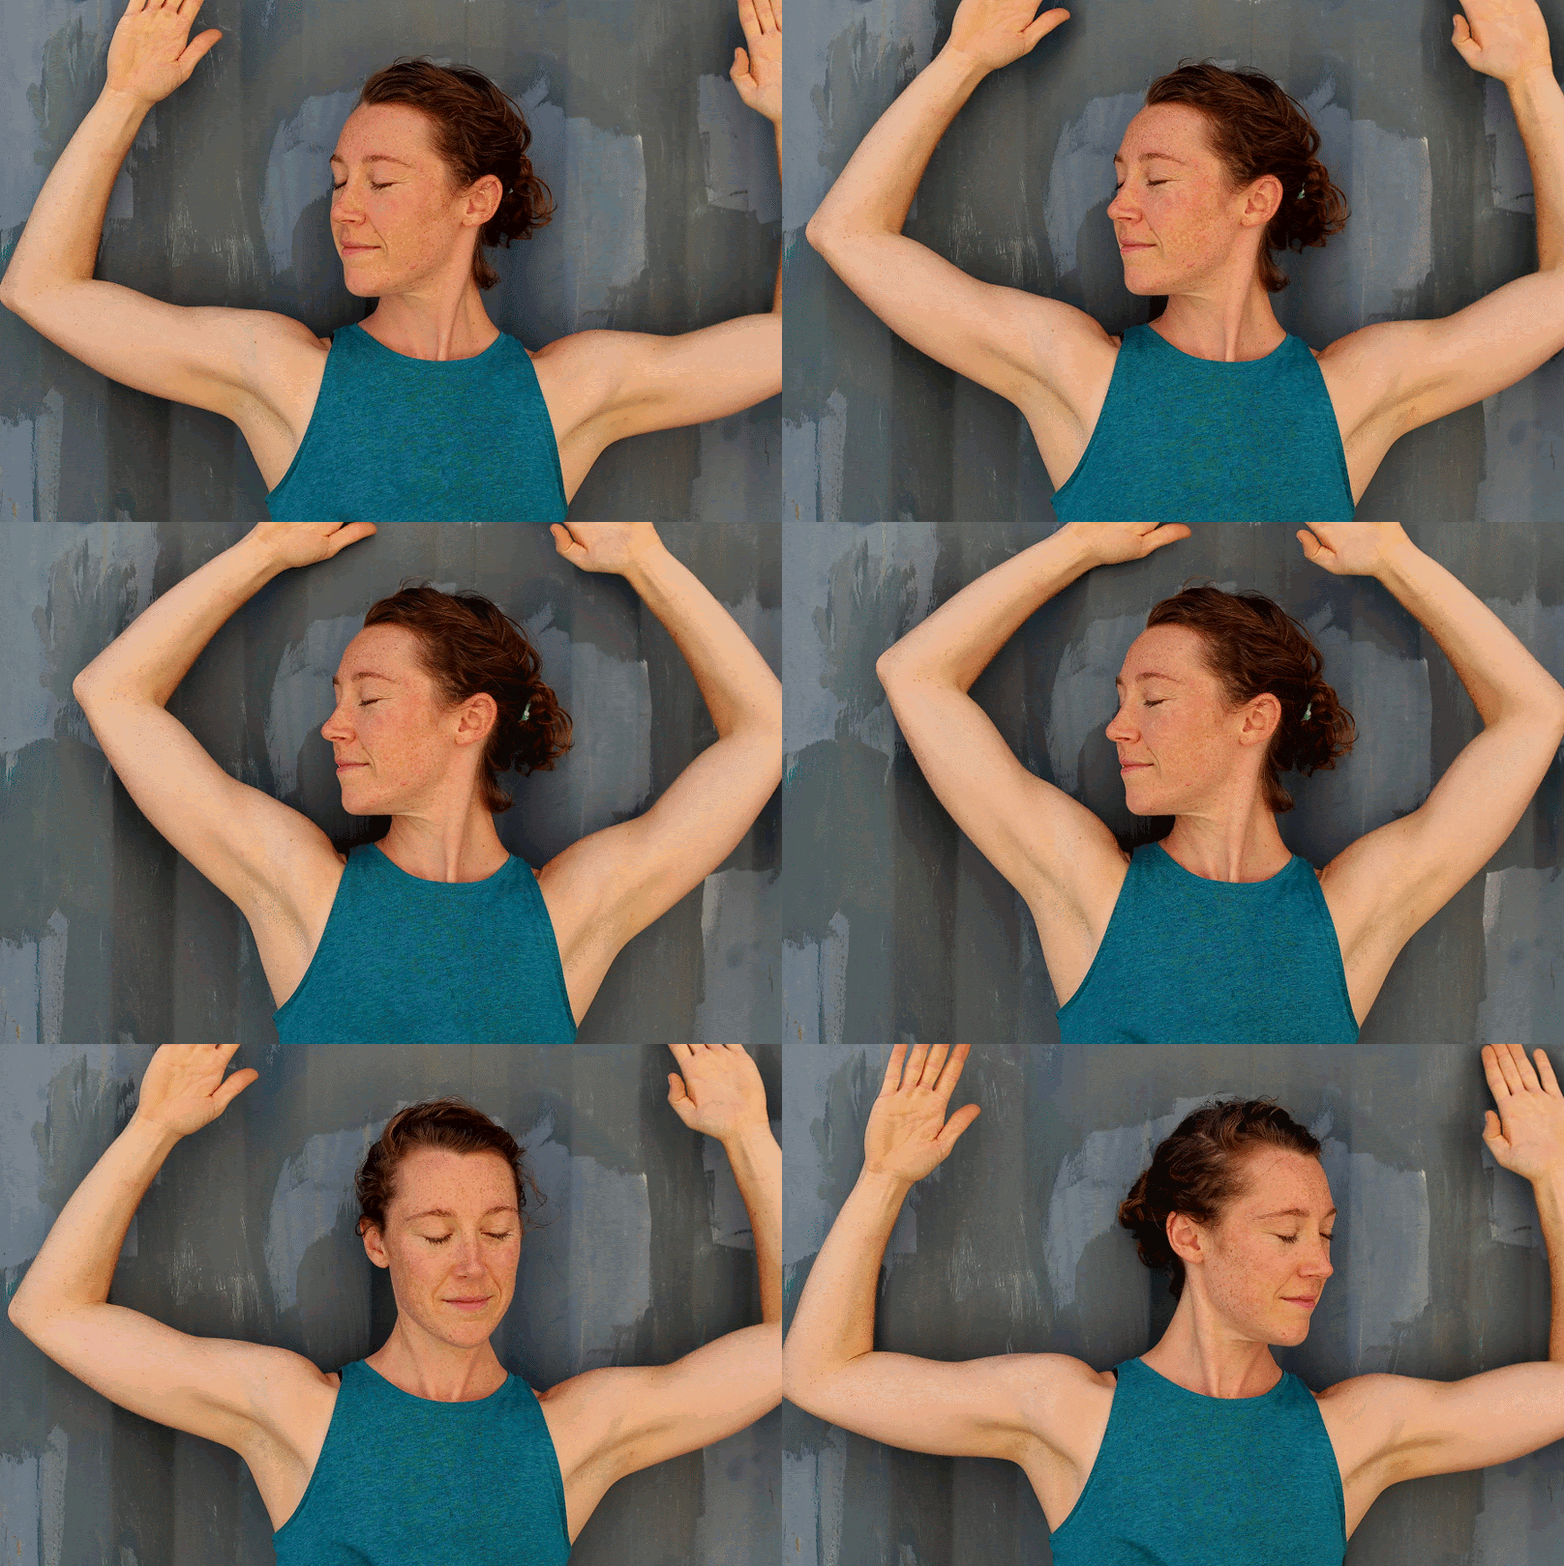
Start with your arms in a cactus or goal post shape at a wall. Draw your ribs in to feel the backside of the body connect to the wall as much as you can. With the core engaged to help maintain that connection, begin to glide your arms overhead, while keeping the cactus-like shape. The fingertips might come a little closer together overhead, or even touch (though that isn’t the goal). Keeping the ribs in, belly engaged, lumbar spine long (no arching), and arms connected, are the most important target areas. Work with the range you’ve got! You’ll likely feel some stretching and opening through the front chest and upper shoulders.
To add, slowly turn your head from side to side to find other hidden cobwebs that might be lurking in there. Don’t worry, it doesn’t need to be coordinated. Just go for feeling! Remember to move slowly!
5. Building Up The Upper Back
Now that the chest is nice and open, we can focus on strengthening the upper back. In the garden or at a desk, we spend so much time hunched over, which weakens the upper back, back of the neck, etc. Here’s a way to build up a little strength, support your posture, and mitigate that tight, slumpy feeling after a day of working in the dirt!
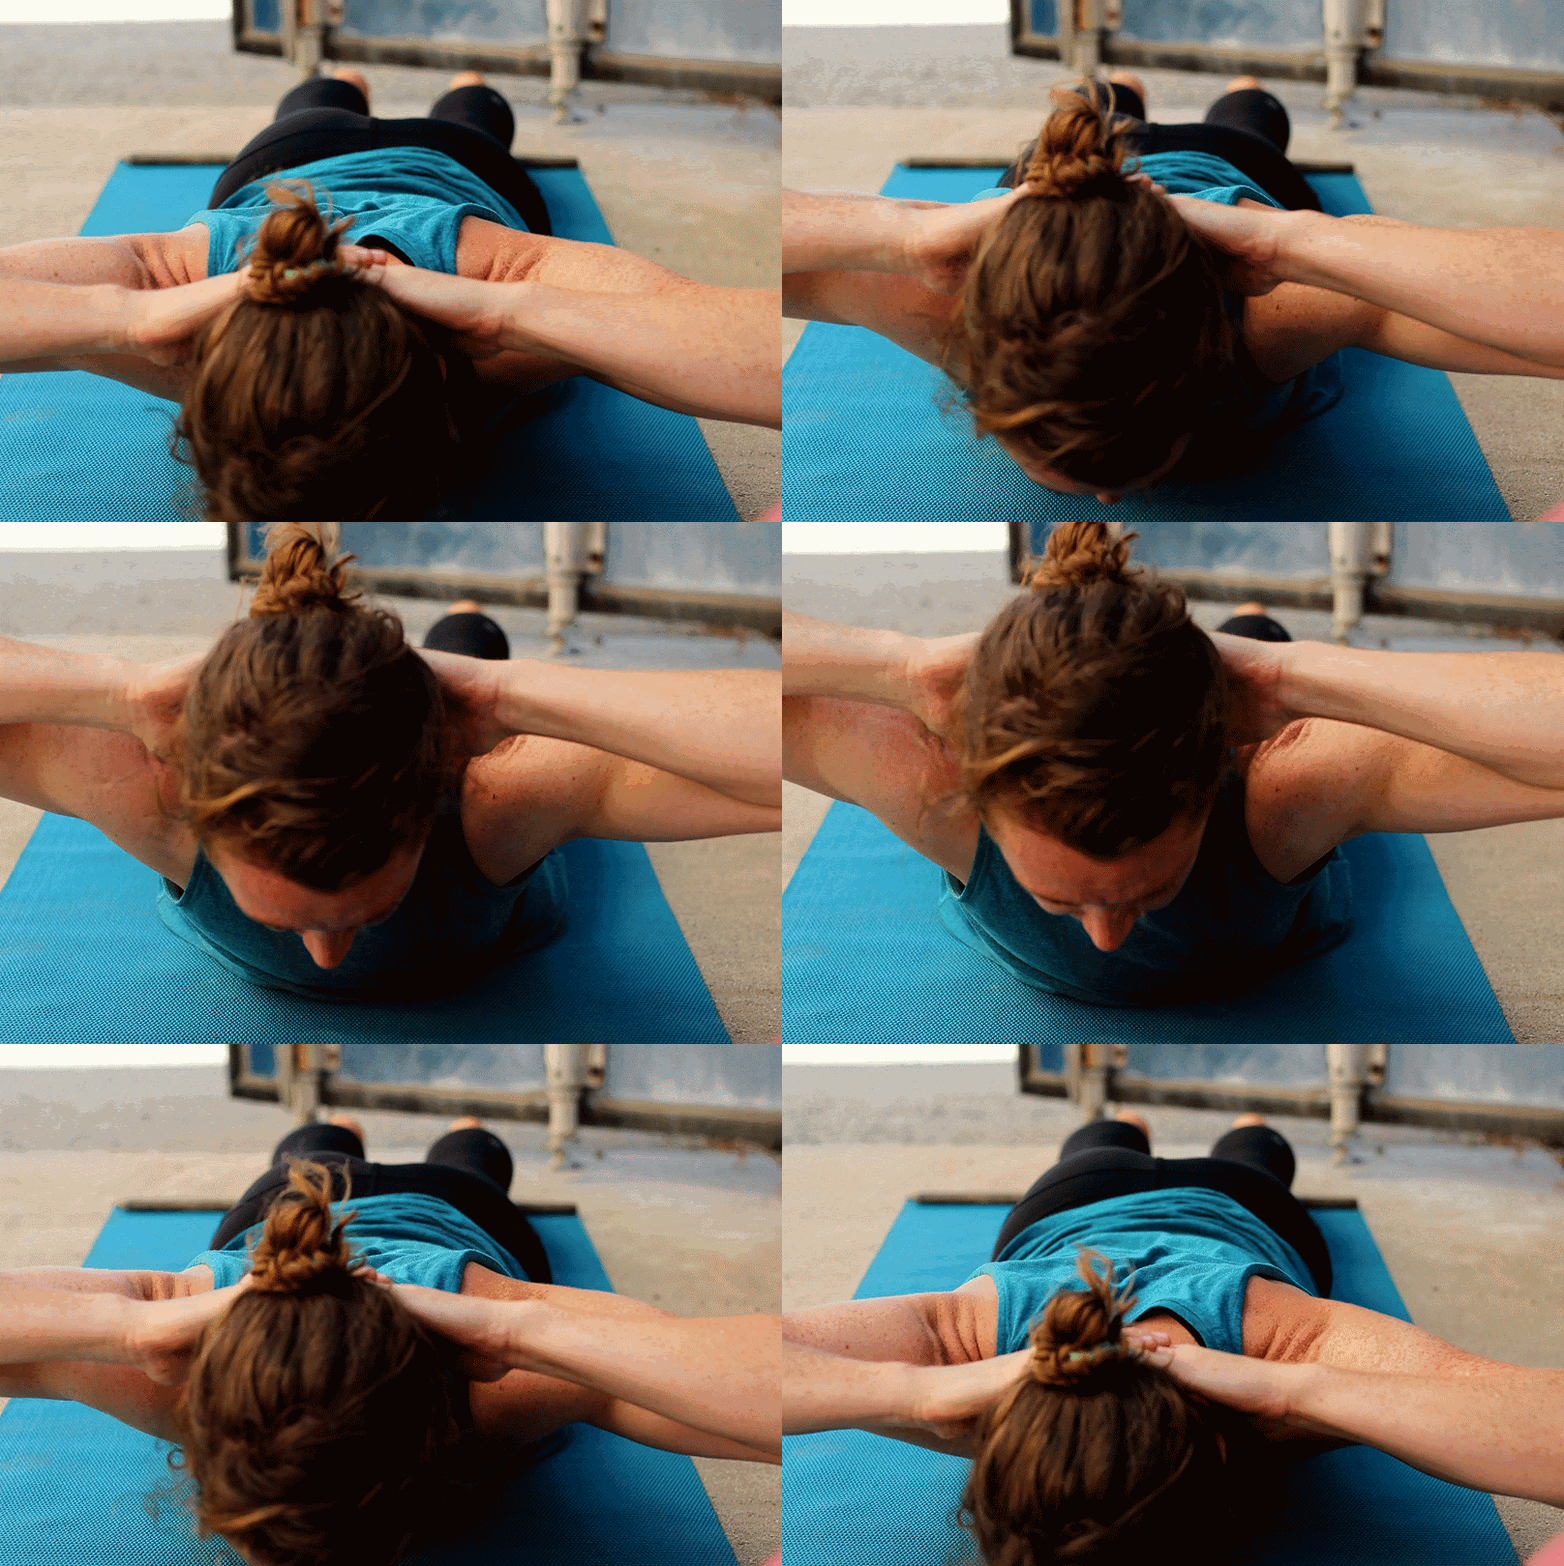
In a prone position, extend your legs behind you with the tops of the feet rooted to the ground. This will help engage the legs, which, in turn, helps to support the engagement of the core. Interlace the fingers behind the head with the elbows wide. With the legs and core strong, lift the head and chest off of the ground. Imagine pressing the back of the head into the hands to keep the neck long and prevent it from dipping down. Pause for a moment at the top, then slowly lower back down. Try not to flop down – use the upper body to resist gravity! Try five to 10 cycles.







5 replies on “5 Functional Mobility Exercises for Gardeners (and, Really, Anyone!)”
Super clear and helpful – love the short clips to illustrate. Thanks Jenn!
Thank you, Jenn. It’s crazy how sore I can get from gardening. 😉
Whitney, right?! Thanks for reading. Take care of yourself this spring/summer!
Great tips! I garden a lot so this is very helpful
Thanks, Patricia! Appreciate you reading.