The process of manually creating something can lead to a deeper understanding and appreciation of the craft. I have always been a hands-on learner, so, on my path to learn more about malas, I wanted to learn how to make my own.
These days, malas are everywhere: to name a few – yoga festivals, yoga studios, and specialty shops. They come in all different materials, colors, and sizes, ranging from relatively inexpensive, to very pricey (depending on the types of beads and gems used). I wanted to make my mala with all-natural materials, using the traditional rudraksha seed as the principal material. I purchased (and then tested) different types of seeds, beads, threads, tassels, and knots until I came up with a simple, lovely, strong mala that I liked – and one that I would use.
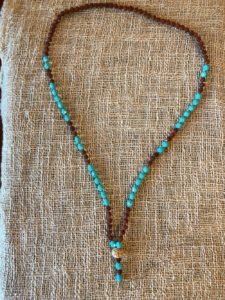
I also wanted to make the process as easy as possible so that anyone with limited time could make a mala without becoming frustrated. In addition to the rudraksha seeds, I added some colored beads, which I’ll refer to use as highlight beads made of glass to give my mala some character. I incorporated a guru bead and a simple tassel, and, finally, I used some tiny seed beads made of glass to act as spacers between beads. (Traditionally, knots are used between beads.)
Here’s what you’ll need
A total of 108 beads. You can use as many as you like of either, as long as the finished product has 108 beads to use for meditation. (The guru bead and other decorative beads that are connected below the guru bead do not count as your 108.)
- rudraksha beads (6-7mm)
- highlight beads (approximately the same size)
- bead cord
- guru bead
- seed beads (about a teaspoon)
- tassel
- scissors
- washer (optional)
- design board (optional)
Notes
- I purchased many of my supplies from Shipwreck Beads (which offered the best prices I could find in the US) and Global Beads.
- Instead of using a traditional, three-hole, guru bead (which can be difficult to string), I used a larger bead with only two holes.
- The exact bead cord I used: natural silk #4, 2 meters, fixed needle.
- The exact seed beads I used: french glass in dark topaz, 11/0.
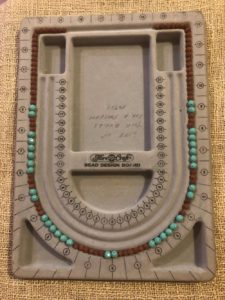
After collecting all of my materials, I developed a simple pattern with the rudraksha and highlight beads and laid it out on my design board. If you don’t have a design board, you can lay your beads on a towel or any other material that will keep your beads from rolling around.
After I counted and collected everything else I needed, I placed everything in a small container, which is useful for keeping all of the materials in one place (in particular, the tiny seed beads). I used a small, recycled plastic container, and, when I was ready to string, I used the top of the lid to hold the seed beads and had easy access to them.
Set The Stage
I find that stringing beads is a meditation in itself. Consider finding a quiet place to work on your mala and setting an intention as you begin your project. You can chant “OM” every time you string a particular bead. (I chose to listen to “Mantras for Life” by Deva Premal and Miten while creating my mala.)
Get Started
Open the bead cord package and unwind the cord from the cardboard spool. Tie the non-needle end to the washer. The washer acts as a stopper for the beads so they won’t slide off and will be removed when you are finished with your mala.
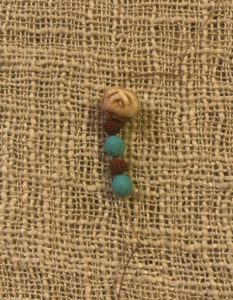
Start by stringing beads in this order: one highlight bead, one seed bead, one rudraksha bead, followed by another seed bead, a highlight bead, a seed bead, and a rudraksha bead. Then, add your guru bead. This is where your mala starts and also where it will end (by double stringing the end pieces – but let’s not get ahead of ourselves).
Put A Pin In It
At this point, it’s a good idea to check and see if your beads can be double strung, meaning, see if it fits to double back into the bead holes with the needle part of your string. You won’t actually do this permanently until you reach the end of your stringing, but it’s good to know that it will work before you put all of the work of stringing your beads in.
Generally, the larger bead that I use for my guru bead has a much larger hole for stringing. (*Note: It will not work to put it at the very end of your mala. Once you are finished stringing, when you go to tie it off, your knot will be smaller than the hole and the large bead will slide off.) Bottom line: Make sure your first/last bead has a small enough hole to hold the knot.
Follow your pattern, continuing to string highlight beads and rudraksha beads, inserting seed beads in between. Keep counting along the way to make sure you have the tiny seed beads inserted between each larger bead (and that you have counted correctly).
Finish Strong
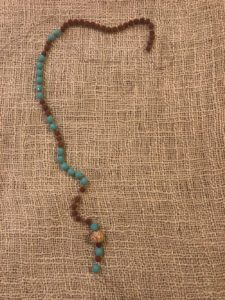
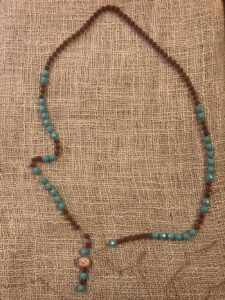
When you get down to your guru bead, you will double string your guru bead and the beads just below it, creating a section of your mala that drops down. Check to make sure all of your beads fit together well with no large gaping. Leave a couple of inches of spare thread at the end of your piece to tie a slip knot to hold all of your beads in place and tying off your tassel. After tying the slipknot, tie your tassel to the end. Voilà! You’re finished.
Next month, we’ll explore etiquette and mantras when using our mala. Until then, get used to the feel of your mala, holding it between your thumb and middle finger. Move the beads along one-by-one while chanting OM (either silently or aloud) or simply observing your inhale and exhale for each bead. Until next time, happy stringing!